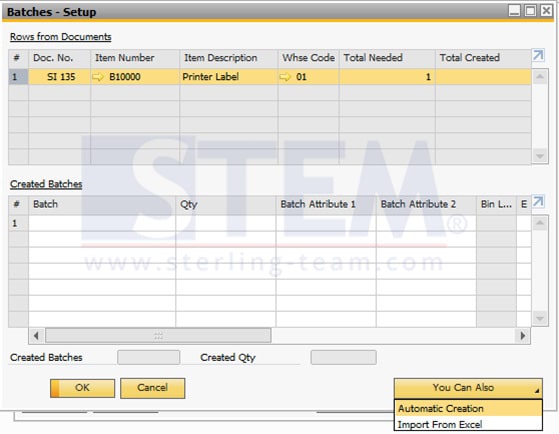
If you have a large number of items to input, you can create batch numbers automatically, and it gives you a lot of time to save. You can create multiple batch numbers automatically for your inventory receipt and issuing documents. How to automatically enter or create batch number? You have to open the Batches – Setup window
There are some methods to open the Batches – Setup window:
- If the management method for your item is set to On Every Transaction, Batches – Setup window will open automatically after you add receipt or issue document.
- If the management method for the item is set to On Release Only, use one of the following methods to open the Batches – Setup window:
- Before adding receipt or issue document, press CTRL + TAB in the Quantity field.
- Before adding the document, right-click in the Quantity field and choose Select Batch/Serial Numbers
- From Go to menu, choose Select Batch/Serial Numbers.

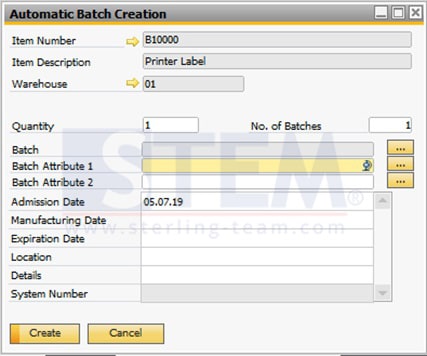
To automatically create batch numbers for the entire quantity, select the Automatic Creation button. Automatic Batch Creation window will appear.

Enter number in Quantity field to define the number of batch numbers that you want to create for the selected item. Choose whether you want to create a batch number and a batch attributes and enter the value. You can specify remaining fields if you want, its optional. Then select the Create button.
Note that after using the Automatic Batch Creation, you still can update each item’s data manually by opening the Row Details – Batches – Setup window. Double-click a row number in the Created Batches table, where you can view and update data for a specific batch. After updating a row, close the window to save your changes.
Select the Update button and the OK button then the data will be saved and the Batches – Setup window will close.
Also read:


